Showing posts with label DIY. Show all posts

Tuesday, March 22, 2011

The Big Red Pants


I don't sew.

I tried once. And no matter how proud of those pillow I am (very proud), I still make sure that the zippered side of the pillows are facing the side of the room you don't see when you first walk in.

But then John & Sherry posted about their curtains that involved no sewing, and I almost peed my pants. After getting past the shock, I went to the fabric store and picked up a roll of Super Weight Stitch Witchery. This stuff is magical. Maybe I'm the only one who hadn't heard of the magical "fusible bonding web"? I think so. Either way, I've been scheming over my next thing to sew without sewing since then.

Just recently, I started seeing these pillows all over the place, and just had to have one in our bedroom.

Via YHL


However, it was this DIY Pillow from Bromeliad Living that won me over. Isn't it gorgeous?

She made that with a thrifted skirt.
So off to the thrift store I went, to find the perfect red skirt. I couldn't find a skirt, so instead I brought home a dress and a pair of pants. Sexy pants. Very. Sexy. Pants.


Don't lie. You know you want the pants.

So I got busy trying to follow her instructions with the pants. And realized she said you needed a skirt for a reason. Because a short dress and pair of pants (no matter how big the bum is) isn't big enough. So I had to improvise. I played around with the fabric for a while and eventually pulled out some other fabric I had, until I came up with this flower-ish thing on some blue fabric.

What do you think? I'm in love. And there was only a very small amount of sewing required. (Probably not as much as is needed..)

I ended up cutting out a few squares. There was probably 7-10 squares about 3-4inches each. They weren't all even. That's not how I roll.

I bunched them all together in 2 different sets (at the time held together with pins) until I liked how they looked. And here came the sewing. Much to my dismay, the bunch was too thick for my $10 Walmart hand sewing-thinger, so I had to do it by hand. To do that I needed a needle.

Think I was exaggerating when I said I don't sew? Think again. I didn't have one sewing needle in our casa. I only had the needles that came with my hand sewing thinga-ma-bobber and they had a head (is that what it's called?). I looked high and low and couldn't find a single one. Until I remembered the sewing kit I took from a hotel that one time. I took it, amused that the hotel had a "mending kit", not because I actually thought I would use it.

Then I sewed the fabric together on the bunched ends. I can't really explain how I did it, because I just kind did until I could hold it without it falling apart.

Then I sewed it to the pillow fabric. Just a few stitches every 3 or 4 bunches and then a few stitches in the center. And somehow.. magically.. it stayed on!

I cut out the fabric for the pillow. Two pieces for the sides, then I cut one of the pieces in 2 for the opening on the back (no zippers!). Then threw a damp rag on top and ironed away.


Project Numero Uno checked off my Bedroom list! :)


Cheers!


Linking to these parties:

Time to Shine @ A Diamond in the Stuff
Anything Related @ All Things Related
Table Top Tuesday @ A Stroll Through Life
Make it yours @ My Backyard Eden
Nifty Thrifty Tuesdays @ Coastal Charm
Tutorial Tuesday @ Hope Studios
Twice Owned @ House of Grace
Handmade Tuesdays @ Ladybug Blessings
Tuesday Tell All @ My Craftie Life
Show me what you got @ Not Just a Housewife
Tutorials & Tips @ The Stories of A to Z
Tip Me Tuesday @ Tip Junkie
Anything Goes @ Type A Decorating
Tuesdays Treasures @ My Uncommon Slice of Suburbia
Tuesday Talent @ Vintage Wannabee
Show & Tell @ Blue Cricket Design
Wow us @ Savvy Southern Style
National Take a Risk Day @ The Nesting Place

Sunday Showcase @ Under the Table and Dreaming 
Weekend Wrapup @ Tatertots & Jello
Saturday Night Special @ Funky Junk Interiors

Tuesday, March 8, 2011

DIY Jewelry Pinboard


My sister-in-law's birthday was earlier this week. We always have a hard time picking out gifts for the hubster's family because they all happen to live in Europe. Which means we need to pick something that 1. we won't get too upset if they don't actually make it there (like that time he mailed his favorite watch so his dad could take it to his favorite watch-fixer-man.. we sent it, and his dad never recieved the package.. the watch gone forever). 2. Something that is not large or heavy, unless we want to pay an ungodly amount for shipping. 3. Something we know they will like or use, because returning it isn't so much an option.

PB Jewelry Display Frames
Every girl loves some jewelry, (as long as every girl = me.. or my sister-in-law..) but we had given her jewelry in the past. So this time I thought a jewelry holder of some sort would be perfect. At first I was thinking of something like these PB Jewelry Display Frames. I love these. But I wasn't sure if she'd "get" it.. I had the image of her opening her package and seeing three empty white frames.. and being totally disappointed.

I was also loving this Modern Chic Burlap Post Board. I just love the vintage letter print on there. Isn't it gorgeous?

Modern Chic Burlap Post Board
And then I saw this PB Striped Pinboard. And my heart melted a little. And I just knew that these were my 3 inspiration pieces. I was ready to make a wired-jewelry-holding-burlap-pin-board with some sort of vintage print.

PB Striped Pinboard
First was finding a frame. No worries, I have a wall full. So I pulled down the green one, once framing the K. I originally picked this frame up at a thrift store a few months back.


I had some burlap, white burlap and muslin already. After much debate, I decided to go with the muslin fabric. I had exactly two cork board tiles left over from our Burlap Monograms. I did have to run to target to pick up some wire and hooks for the jewelry holder part. Besides that, I had everything else at home.


First part was cutting and gluing the cork board to be the size of the frame. Then with some spray adhesive I sprayed on the muslin. I also used the spray adhesive to glue scrapbook paper to the other side so the back of the frame would be pretty-ish.


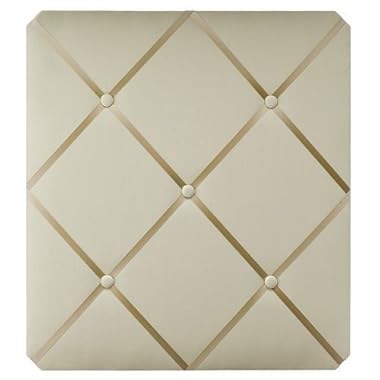
Originally, I was just going to have the wire go straight across the board. But in target, I saw a French Twill Memo board with the crossed ribbon and decided to go this route.

Target French Twill Memo Board
I sprayed the wire with Krylon Metallic ORB (oil rubbed bronze) spray paint. But after laying them out on the board, I still wasn't crazy about it. Something was missing. At the time I had a piece of sandpaper next to the frame (pic above), the sandpiper was a deep purple and I realized how well that color complimented the green frame. And I just happened to have some deep maroon ribbon left over from our wedding. So I wrapped the ribbon around the wire and loved it! I wrapped the wire around hooks on the back of the frame, as well as using decorative nails (also left over from the Burlap Monogram) to keep them all in place.


I was still debating on whether or not to add some sort of vintage stamp print on the fabric, but decided against it. Then I hung her on the wall to take some pictures. And had to talk myself out of keeping her for myself. Because I love how she turned out! I just hope my dear sister-in-law feels the same way!


Linking to these parties -
Nifty Thrifty Tuesdays @ Coastal Charm
Tutorial Tuesdays @ Hope Studios
Twice Owned Tuesdays @ House of Grace
Show Me What Ya Got @ Happy Housewife
Tip Me Tuesday @ Tip Junkie
Under 100$ Linky Party @ Beyond the Picket Fence
Show & Tell @ Blue Cricket Design
Show off your Stuff @ Fireflies & Jellybeans
Restore it Wednesday @ Restore Interiors
Just White & Wow Us Wednesdays @ Savvy Southern Style
Get Your Craft on @ Today's Creative Blog
Before & After Party @ Thrifty Decor Chic
Made by You @ Skip to My Lou
Anything goes @ Type A
Tag Back Tuesdays @ Mommying On the Fly, Life with Twins & Multiples, Boobies, Babies & a Blog
Upcycled Awesome @ The T-shirt Diaries
Weekend Bloggy Reading @ Serenity Now

Tuesday, March 1, 2011

Dumpster Dive to PB!

I pulled in the parking lot after work one day and was walking up to the apartment I spotted this beauty, err.. mess hanging out right next to the dumpster. I stopped and thought about it, then continued on. As soon as I got into the house I thought, Wait! What am I thinking.. and quickly ran out to the dumpster (..as if someone else was going to take it..) and picked up my new table.

Isn't she a beauty? Hmm.. let's rephrase. Doesn't she have so much potential?


So I promptly set her in our entryway. And there she sat. Until the Mr. got annoyed enough that he moved her to the front porch. And there she sat. Until I got embarrassed enough that the bright red, falling apart table I stole from the dumpster was on our front porch for all our neighbors to see, including the one who once threw this away, so I brought her inside.

Then I covered her in paint thinner and scraped off some paint, three times. But she still had tons of residue. Then I gave her a good sanding, too many times time count. At the time, I was pretty certain those round legs were going to be the death of me. But don't fret, I survived.

After the paint thinner:


After the sanding:


The wood wasn't in good shape, so I knew I'd have to paint her. But I've always been a fan of dark, natural wood so having to paint her intimidated me.

At first I thought I'd make a bar cart out of her. Then I wanted to make her into a table top sign, like Donna's at Funky Junk Interiors. Then she was going to be a side table in the living room. However, I wasn't crazy about any of those ideas in the apartment.

Then one weekend the Mr. and I were walking around downtown and stopped in Pottery Barn. Like always, they have so. many. trays. And I always want every. single. one.

A girl can dream can't she?


Darn price tags.

I digress, in PB that day was when I realized exactly what my little red table could become. A tray! So home I went ready to roll.

Of course, I forgot to take some pictures in the process (I'm still learning!).

I picked up 2 pieces of metal from Lowe's. They were originally the standard silver color, but some Krylon Metallic ORB (oil rubbed bronze) spray paint fixed that.

I tore off the top of the table, and to my surprise underneath actually had a logo from the company that made the table. The wood was a lot better on that side too. So with a little more sanding and some Dark Oak stain, they were good to go. The wood was still definitely worn, but that gave it a perfect Vintage look.

I nailed the metal pieces around the tray. Don't be fooled. It sounds easy. But nailing the metal to the tray was somehow the hardest part of the project. Something about have to position, force the bend and nail at the same time didn't work so well. But so worth it, either way!


And that was it! I still want to give the tray handles and think sisal rope would be perfect, and happened to have some left over from the Sisal Basket I made. I just need to make a trip to the store to pick up a new drill. My current drill decided it no longer wanted to drill.


What do you think? In total, the metal was about $4 a pop. So I spent a whopping $8 on this project, as I had all the other supplies. Take that PB!


Link Parties - Made byYou Monday's

 http://linda-coastalcharm.blogspot.com/Tip Junkie handmade projects
Get Your Craft On TuesdayHOG

Friday, February 25, 2011

Antiqued Books to Satisfy my Nerdy Obsession


Remember my love affair with books?

No matter how much I L.O.V.E. books, I still can't bring myself to buy books for decoration. I'm sorry. I just can't do it. Unless of course you're talking 50 cent books at the thrift store. That, my friends, I can handle.

So when I saw how you can make your own antique books. Me oh my, how excited I was. I dropped everything, ran to the thrift store, picked up some books and started right away!


Off came the book covers.


I heated some water in my favorite red teapot. Made some tea.


Squeezed the excess water from the tea bag so the books wouldn't get soggy. Rubbed the book pages. Rubbed to hard, broke the tea bag. Whoops. It's all good, just keep going. Then I waited impatiently for them to dry. Then repeat, x3, or more if you want them darker. I did, but didn't have the patience to wait. I know Mom, I know...

Then I realized I didn't have any jute twine to tie them in. No worries. Next to my craft chest was a Whole Foods bag that has been sitting there for 6 weeks now with things I need to donate. Lightbulb! I tore off the handles and used that to tie the books. Perfect!


And how lovely they look on the mantle with that sunburst mirror and Live sign.


What do you think? Is there anything you love but refuse to buy just for decor?


PS - You wouldn't even believe it if I told you. But Roeshel featured my sunburst mirror over at The DIY Showoff! How awesome is that?!? Need I say I spent another day squealing like my 6 year old cousin. Thank you so much Roeshel, you're awesome!


Link Parties -
Chic on a Shoestring Decorating Lovely Crafty HomePhotobucket
Related Posts Plugin for WordPress, Blogger...