Showing posts with label Art. Show all posts

Tuesday, March 8, 2011

DIY Jewelry Pinboard


My sister-in-law's birthday was earlier this week. We always have a hard time picking out gifts for the hubster's family because they all happen to live in Europe. Which means we need to pick something that 1. we won't get too upset if they don't actually make it there (like that time he mailed his favorite watch so his dad could take it to his favorite watch-fixer-man.. we sent it, and his dad never recieved the package.. the watch gone forever). 2. Something that is not large or heavy, unless we want to pay an ungodly amount for shipping. 3. Something we know they will like or use, because returning it isn't so much an option.

PB Jewelry Display Frames
Every girl loves some jewelry, (as long as every girl = me.. or my sister-in-law..) but we had given her jewelry in the past. So this time I thought a jewelry holder of some sort would be perfect. At first I was thinking of something like these PB Jewelry Display Frames. I love these. But I wasn't sure if she'd "get" it.. I had the image of her opening her package and seeing three empty white frames.. and being totally disappointed.

I was also loving this Modern Chic Burlap Post Board. I just love the vintage letter print on there. Isn't it gorgeous?

Modern Chic Burlap Post Board
And then I saw this PB Striped Pinboard. And my heart melted a little. And I just knew that these were my 3 inspiration pieces. I was ready to make a wired-jewelry-holding-burlap-pin-board with some sort of vintage print.

PB Striped Pinboard
First was finding a frame. No worries, I have a wall full. So I pulled down the green one, once framing the K. I originally picked this frame up at a thrift store a few months back.


I had some burlap, white burlap and muslin already. After much debate, I decided to go with the muslin fabric. I had exactly two cork board tiles left over from our Burlap Monograms. I did have to run to target to pick up some wire and hooks for the jewelry holder part. Besides that, I had everything else at home.


First part was cutting and gluing the cork board to be the size of the frame. Then with some spray adhesive I sprayed on the muslin. I also used the spray adhesive to glue scrapbook paper to the other side so the back of the frame would be pretty-ish.


Originally, I was just going to have the wire go straight across the board. But in target, I saw a French Twill Memo board with the crossed ribbon and decided to go this route.
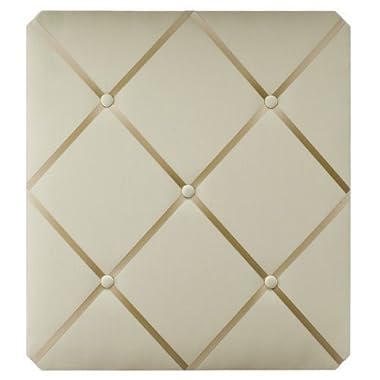
Target French Twill Memo Board
I sprayed the wire with Krylon Metallic ORB (oil rubbed bronze) spray paint. But after laying them out on the board, I still wasn't crazy about it. Something was missing. At the time I had a piece of sandpaper next to the frame (pic above), the sandpiper was a deep purple and I realized how well that color complimented the green frame. And I just happened to have some deep maroon ribbon left over from our wedding. So I wrapped the ribbon around the wire and loved it! I wrapped the wire around hooks on the back of the frame, as well as using decorative nails (also left over from the Burlap Monogram) to keep them all in place.


I was still debating on whether or not to add some sort of vintage stamp print on the fabric, but decided against it. Then I hung her on the wall to take some pictures. And had to talk myself out of keeping her for myself. Because I love how she turned out! I just hope my dear sister-in-law feels the same way!


Linking to these parties -
Nifty Thrifty Tuesdays @ Coastal Charm
Tutorial Tuesdays @ Hope Studios
Twice Owned Tuesdays @ House of Grace
Show Me What Ya Got @ Happy Housewife
Tip Me Tuesday @ Tip Junkie
Under 100$ Linky Party @ Beyond the Picket Fence
Show & Tell @ Blue Cricket Design
Show off your Stuff @ Fireflies & Jellybeans
Restore it Wednesday @ Restore Interiors
Just White & Wow Us Wednesdays @ Savvy Southern Style
Get Your Craft on @ Today's Creative Blog
Before & After Party @ Thrifty Decor Chic
Made by You @ Skip to My Lou
Anything goes @ Type A
Tag Back Tuesdays @ Mommying On the Fly, Life with Twins & Multiples, Boobies, Babies & a Blog
Upcycled Awesome @ The T-shirt Diaries
Weekend Bloggy Reading @ Serenity Now

Friday, February 11, 2011

My printer loves burlap too

Remember the beginning of my burlap obsession? I saw this laundry sign in the midst of that burlap frenzy and just loved it. A burlap sign has been on my to do list ever since. Only after my first attempt with stenciling did I realize that to stencil a sign with that many words would be misery. And I never have freezer paper and always forget to pick it up. But only last week when I was oogling Stephanie Lynn's sunburst mirror did I learn that you can print directly on fabric with your inkjet printer with just glue, fabric and a piece of paper. And me oh my, how excited I was that I didn't have to make a trip to the store.

Off the wall came one of the three lonely frames that I hung without pictures in my living room. I used spray adhesive to glue muslin fabric to a piece of paper. I sprayed a bit too much adhesive, but it was ok because I would be cutting out the middle to fit a 4x6 frame.


I downloaded a free stamp-look-a-like font, and printed out "Live". It turned out perfectly.


So perfectly that it just had to go on my mantle with my new sunburst mirror instead of back on the wall of frames.


Next up, printing on burlap for that sign I've been wanting in the bathroom ;)
Cheers!!!

Link Parties! -
Lovely Crafty Home

Tuesday, February 8, 2011

Gandhi's Words

I stumbled on this Gandhi Printout the other day and I just love it!


Francesca put it together and is wonderful enough to let anyone download it for free.  So that's just what I did. First I put it in a wooden frame and hung it in the hallway.


But it just didn't do it for me. So after much internal debate, I've changed the frame and now it's hanging in my bathroom. It may just become the inspiration for my much needed bathroom makeover. Lovin' it!

Sunday, February 6, 2011

I love Sunburst Mirrors

I've been seeing sunburst mirrors all over blog world. And have never stopped drooling over them. I finally decided it was time to stop dreaming and to just make one already!


With a great tutorial all I needed was supplies. I already had a set of circle mirrors I had picked up on a thrift store trip a while back, and hot glue. So all I needed was the sticks. I picked a set up from HomeGoods / Marshalls (are they one store now?) for $9.99 and got busy.


The sticks were originally a few feet long. So, first I cut the sticks to be about 18 inches give or take. I ended up getting 3 sets of 18" sticks and one set of 15" sticks. Then I cut one of the 18" set to be about 16/17 inches to add some variety. I hot glued them all on and tried to make sure the different length sticks were in as random of an order as possible (random is hard for my pattern-needing self) to add some variety.


I covered the mirror and sprayed the sticks white. Only to decide I wanted grey, so I headed to Wally World to pick up grey spray paint ($4). Have I ever told you how much I love love love grey? I do. So a grey sunburst mirror.. it's just heaven!


After it was grey I thought the mirror was a little too small, and realized I hadn't been careful enough when hot gluing-- so there were a handful of clumps that were very visible. So I picked up a 10" candle plate mirror from A.C. Moore ($6) to glue on top of the existing mirror and sticks. And that was the final touch!


I am so happy with how it turned out. Now this beauty is hanging about our no-longer-just-a-wanna-be mantle.


I've seen these online for anywhere from 170$ to 450$, not including shipping. In total I spent a whopping, $19.99. Go savings!


PS - The Mr.'s response?
"I like it, you did good. However, it's not really functional. I mean, I can't even see my face in the mirror."
Note to self - Never hang mirror higher than husband's face.


Link parties! -
UndertheTableandDreaming
The DIY Show Off
Domestically Speaking
My Romantic Home's Show & Tell Friday ( I couldn't find her button!)

Monday, January 31, 2011

Via Carducci

Ever since my first attempt at a wooden sign I've been craving more. I stumbled upon this tutorial on how to give new wood that rustic look I love so much.. and knew exactly what I wanted to make next.


In what seems to be my never ending re-decorating of our bedroom and my attempt to personalize the space,  a 'Bolzano' sign seemed  perfect. This is where the Mr. and I first met. After sitting on that idea for a few days, I had an even better idea. And here she is:


 Via Carducci. It's the name of the street we lived on when we were in Bolzano. I think 'Via Carducci' is more romantic that just 'Bolzano' and adds a little mystery. Plus, I have an strange thing for Italian street signs, like these.. i just love them:


So without further ado, here's the how-to (unintentional rhyme (or not?)).

I picked up a piece of wood from Lowe's. Cut it in two. Painted it brown using watered down paint.


Dipped a paper towel in black paint and rubbed a bit of that in.


While letting it dry, I printed the letters for 'Via Carducci' then cut out a stencil using the stencil plastic paper I picked up from A.C.Moore a while back. Taped the stencil on the wood and painted black over. Truth be told, I had to do this twice. The first time I used acrylic paint and probably went a little too fast (I was excited for the finished sign!).  When I lifted up the stencil it had smeared alot. So I simply turned the sign over to the other side and started again. This time I was more careful and used the black paint from Lowe's.. this seemed to work better.


Then I impatiently let her dry..


I loved her so much that I tried her all over the house before going back to my original plan of putting her in our bedroom.


Now she rests on our dresser, with white hydrangeas next to her (no picture.. sorry). I still have the other half left. I have some ideas for this buddy.  You see, I like lists.. a Lot, with a capital L. Here's an embarrasing picture of what my little woman nook normally looks like.


What I really need is a place to keep my lists. So i thought hmmm... and added some post its on for size.


Seven post its. Seven days a week.. perfect fit? I'm thinking chalkboard paint? Or maybe white board paint?
For now this guy is hanging out at my desk until I figure out what to do with him.

Monday, November 29, 2010

Radiate Love

For Thanksgiving we had my family, my godparents & family, and my aunt & her husband over. Did I mention that we have a small 2 bedroom apartment? So I was running around like crazy trying to get the house all decorated and pretty before Thanksgiving. I did quite a bit, only I didn't have time to post everything. Here's one of the To-Do list things that I finished last week.

I knew the minute I saw this sign I had to make one myself. So I did. Here it is:


I picked up some wood from Lowe's. I cut 6 pieces of wood the same height. I had also picked up a skinny piece. I cut that in two and nailed each piece into the back. This held all the pieces together. I realize now that I didn't get a picture of the back.

I found this post on how to make old signs. But I couldn't decide on another color besides green. So I decided to only use green on top of white.

 I primed the wood, then painted it white. Then painted it green using acrylic paint. I spent too much time to tell you trying to make the perfect green, mixed with white and black. Only to get annoyed with my indecisiveness and pour the green directly on the wood from the bottle, without mixing.


Then I got a little nervous with how bright the green was. So I painted a layer of gray over top. Being impatient, the green wasn't fully dry. So it mixed in with the green rather than coating a layer on top of the green.

I let it dry. Then sanded. I initially went at it with the sander. Mistake. It went right to the bare wood, showing no sign of the white. Only when I lightly hand sanded did I actually get the distressed look I wanted with the under white layer showing through.


I picked up the wooden letters from A.C. Moore. Coated them with white paint and then sanded them a bit for the distressed look.


Then it took me forever to decide which way to put the letters. Once I decided, I glued the letters on with wood glue and let it dry for 2 days.


Originally, I was thinking this would go in the bedroom. But after finishing it, I decided that it didn't look right next to the monogram.  So this baby is now hanging in the staircase from the foyer to the apartment. So it's the first thing you see when you come, and the last thing you see when you leave :P 


Related Posts Plugin for WordPress, Blogger...